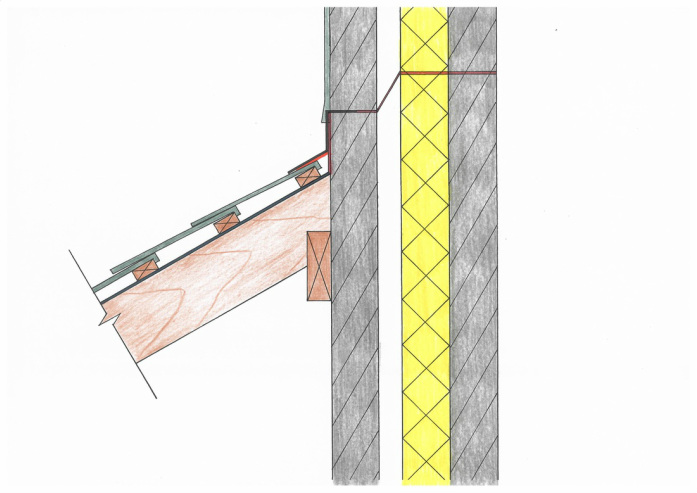
It is essential that the abutment of the roof to the house is properly sealed to prevent moisture penetration.
Lead flashing is chased into the external block, allowing it to overlap the lead upstand coming from the tiles.
Stepped DPC across the cavity ensures that any moisture that penetrates the external block will not travel down the cavity.
Lead flashing is chased into the external block, allowing it to overlap the lead upstand coming from the tiles.
Stepped DPC across the cavity ensures that any moisture that penetrates the external block will not travel down the cavity.
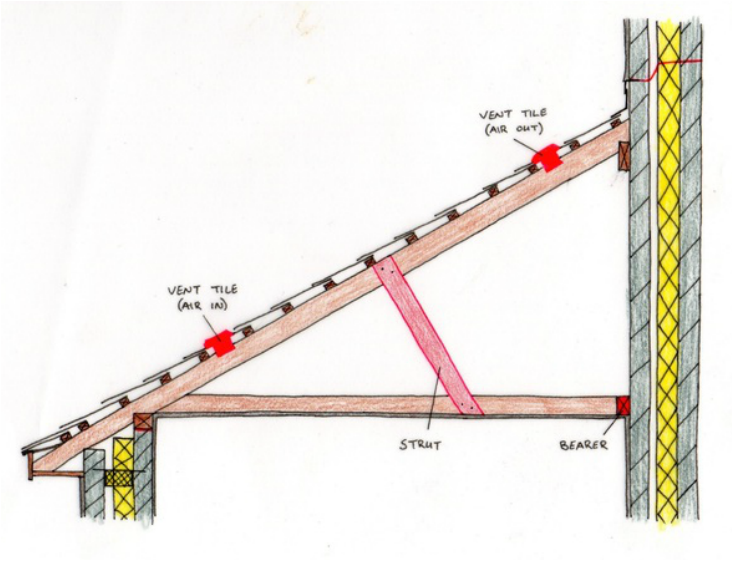
If asked to draw both the eaves and abutment details of a lean-to-roof, joists and struts must be included.
The ceiling joists are extended to the inner cavity wall, where they are attached to a bearer which is bolted to the wall, acting as a wallplate.
In order to provide support to the lean-to-roof, a strut is attached to the ceiling joists and rafters, providing support for the loads of the roof.
Adequate ventilation must also be provided to prevent the decay of the timbers.
|
Video of Abutment Detail Drawing
This video shows the most effective approach for drafting the drawing of the abutment detail. Note: Labeling and material symbols also need to be included. |
|